First Grade
Folk Art Weaving
Weaving is one of the oldest surviving crafts in the world as it can be dated back to Neolithic times – approximately 12,000 years ago! Weaving involves interlinking a set of vertical threads with a set of horizontal threads and is one of the main ways of making textiles or cloths. Of course other materials besides thread can be used, such as sticks (make a woven fence), reeds or other fibers (make a basket), rope or synthetic material (make a chair), or paper (make art!).
Weaving can be done by hand or by using machines. Machines used for weaving are called looms. Looms started as crude wooden frames and gradually transformed into the modern sophisticated electronic weaving machine. Nowadays weaving has generally become a mechanized process, though hand weaving is still in practice.
Weaving can be done by hand or by using machines. Machines used for weaving are called looms. Looms started as crude wooden frames and gradually transformed into the modern sophisticated electronic weaving machine. Nowadays weaving has generally become a mechanized process, though hand weaving is still in practice.
The Project
Prep: one hour, including making sample
Print: Navajo weaving
Materials:
-6x12" green weaving loom (see below)
-6 - 1-1/2"x6" contrasting strips for weaving
-extra green paper for head, tail and legs
-glue sticks
-oil pastels
Parent Prep:
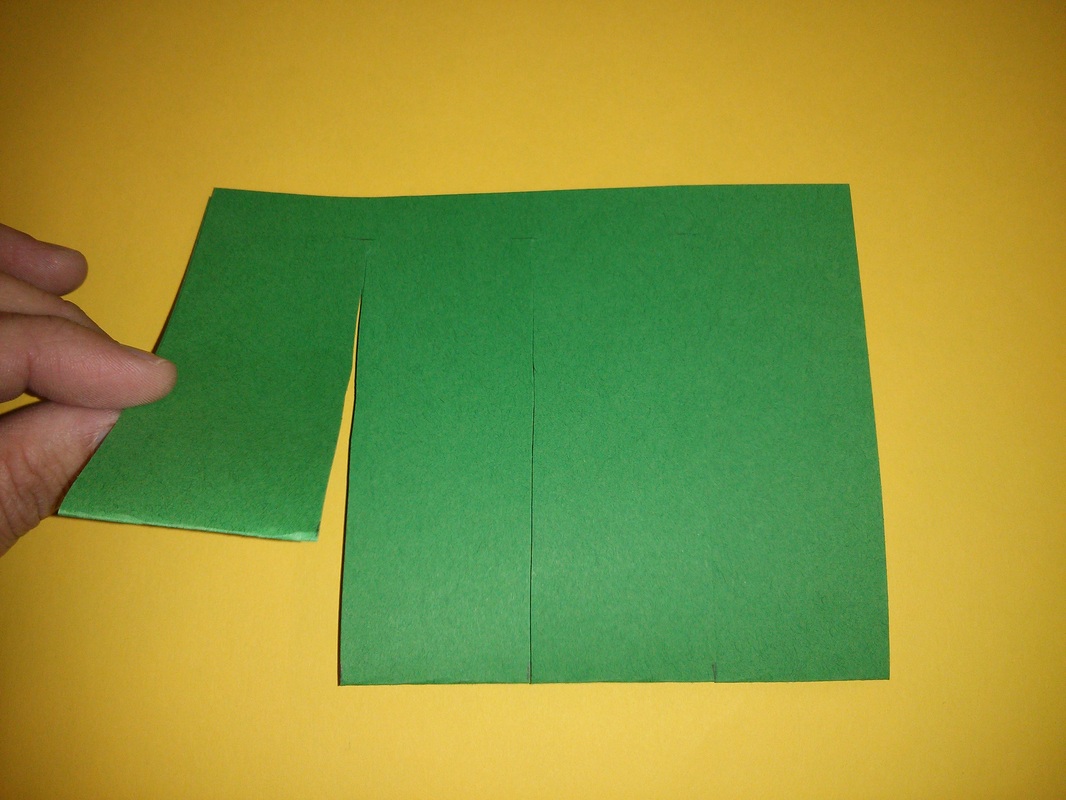
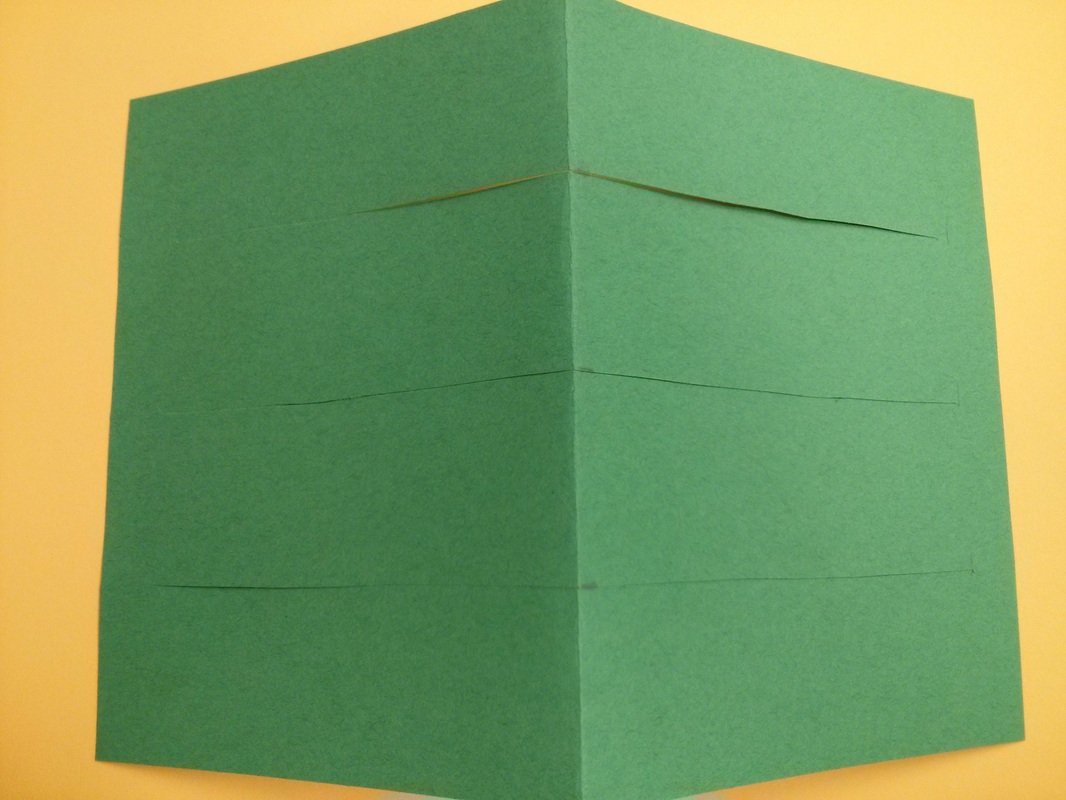
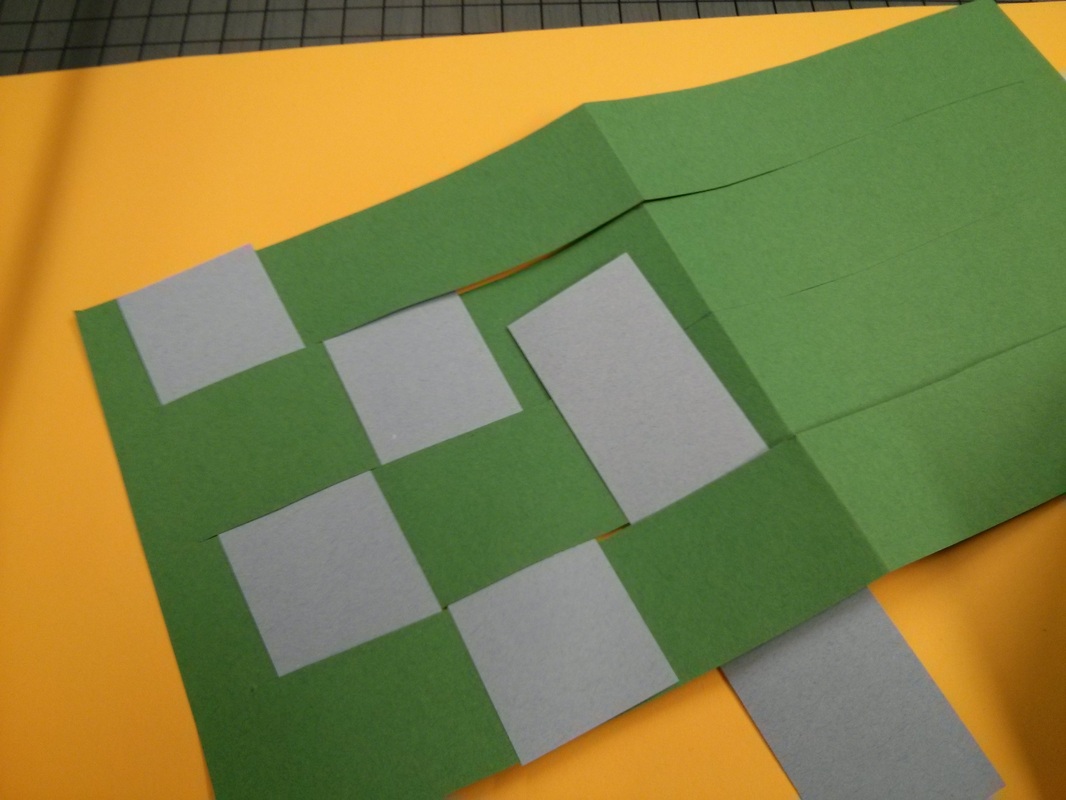
Prepare loom for each student: fold 6x12 paper in half on the short end (should make a square), then mark out (or estimate) 1-1/2 strips across. Cut from fold to 1/2" (approximate) from ends. Open up. This is the loom. (See picture steps below)
Project Instructions:
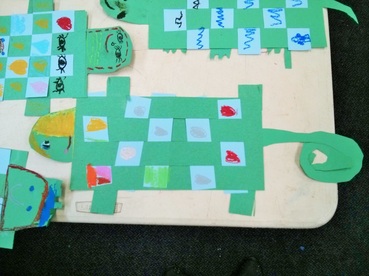
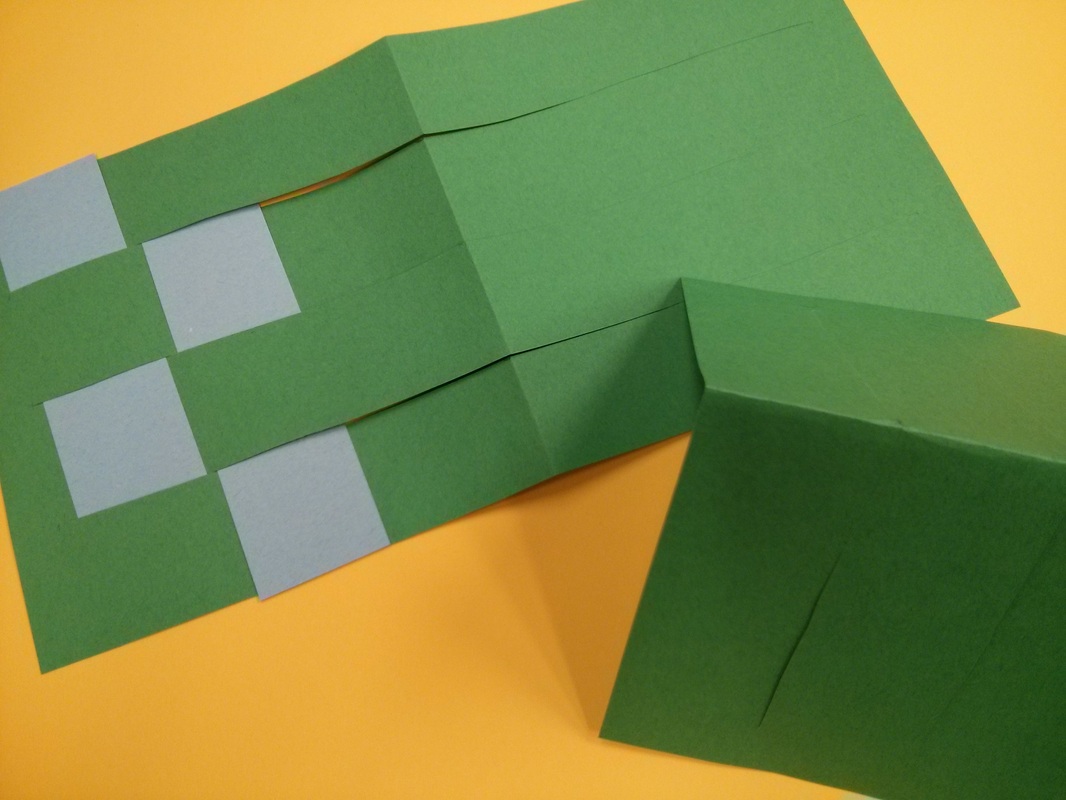
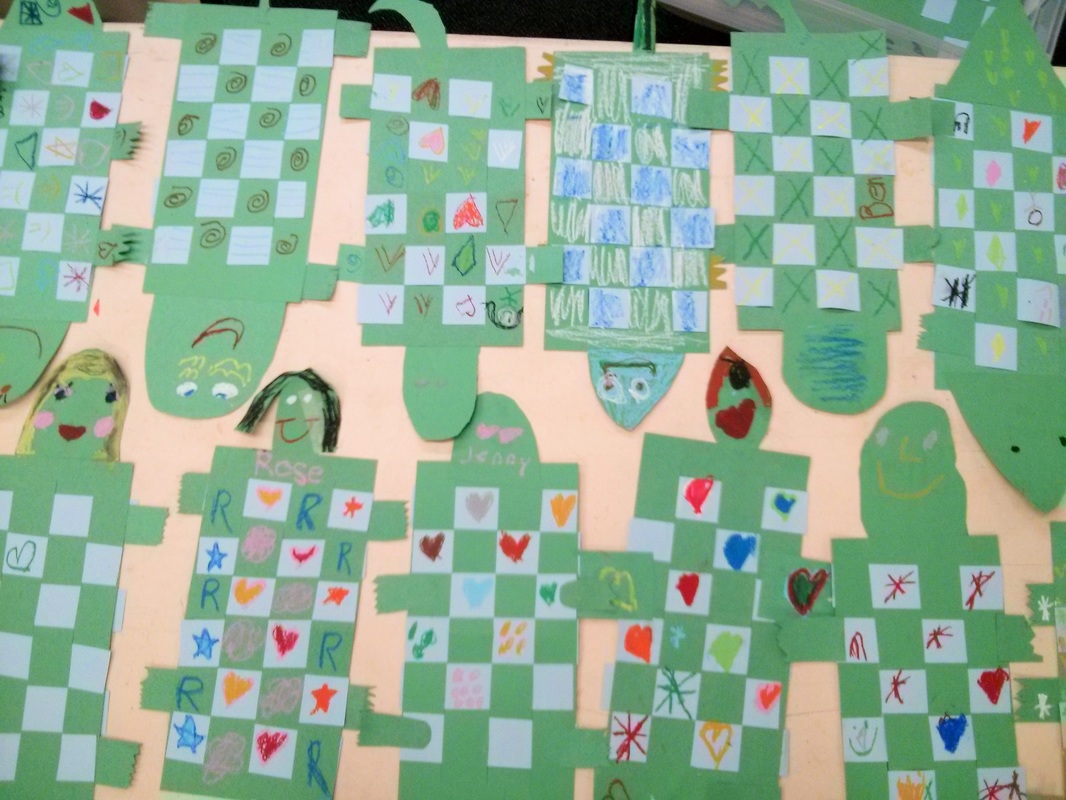
Demonstrate to the students how to weave their contrasting paper in and out of the loom. With only 6 strips, there is plenty of room for it to be a little loose, and should not be overly difficult for the first graders to accomplish this. Have them glue the ends in place when they are done.
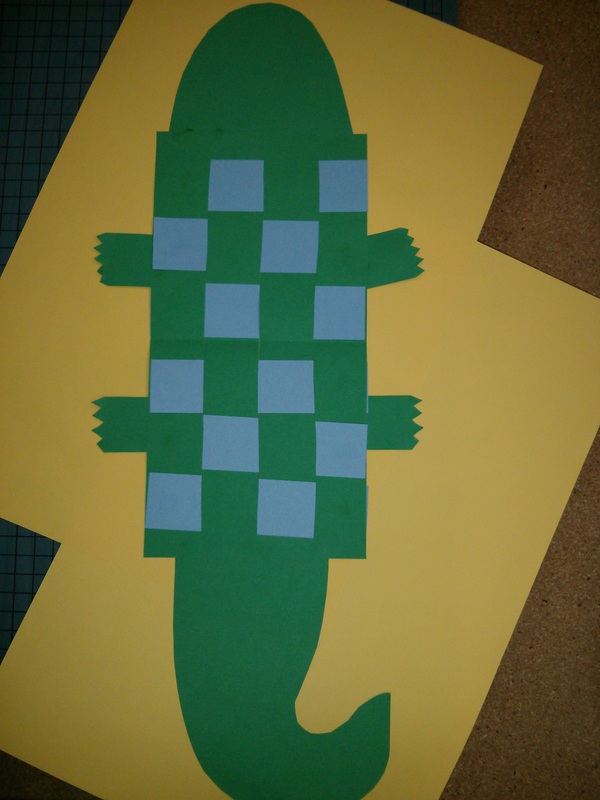
With another sheet of green (or other scraps, if the pieces are large enough), have the students cut out a triangular head and tail, as well as some small squares or rectangles for feet. They can trim the feet to look like pointy claws if they desire. Glue these pieces in the appropriate places.
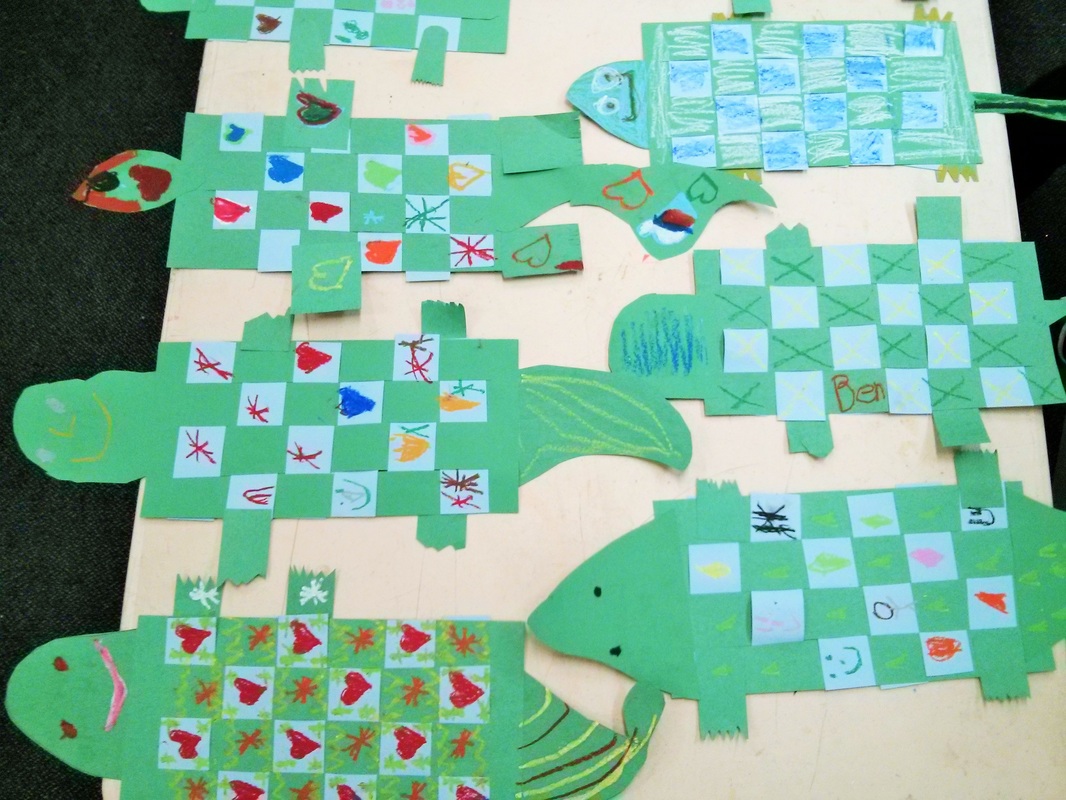
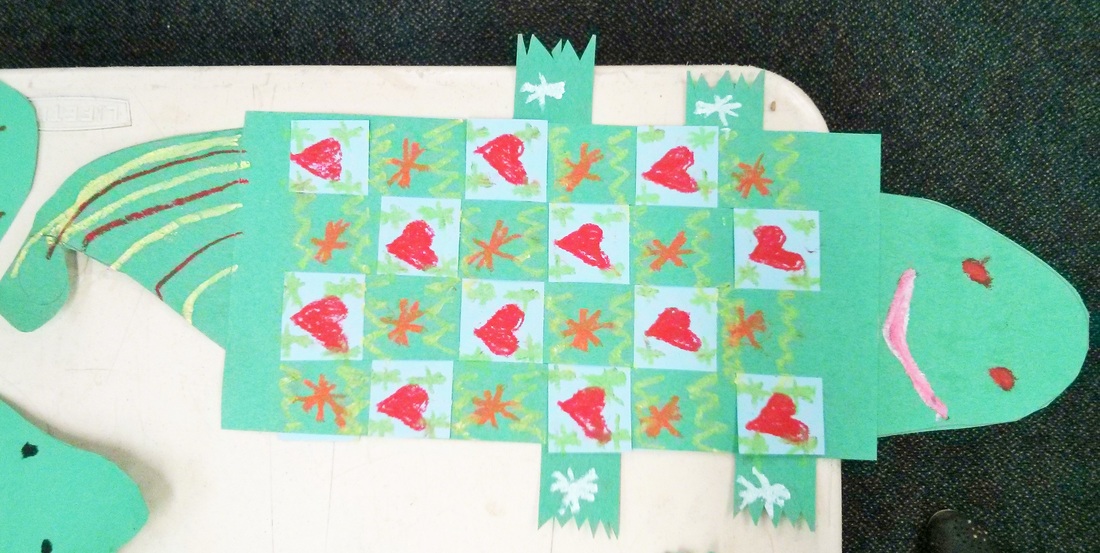
Pass out a box of oil pastels to each student to decorate their alligators with simple patterns and designs, including a face. Remind them to write their name on the back.
Print: Navajo weaving
Materials:
-6x12" green weaving loom (see below)
-6 - 1-1/2"x6" contrasting strips for weaving
-extra green paper for head, tail and legs
-glue sticks
-oil pastels
Parent Prep:
Prepare loom for each student: fold 6x12 paper in half on the short end (should make a square), then mark out (or estimate) 1-1/2 strips across. Cut from fold to 1/2" (approximate) from ends. Open up. This is the loom. (See picture steps below)
Project Instructions:
Demonstrate to the students how to weave their contrasting paper in and out of the loom. With only 6 strips, there is plenty of room for it to be a little loose, and should not be overly difficult for the first graders to accomplish this. Have them glue the ends in place when they are done.
With another sheet of green (or other scraps, if the pieces are large enough), have the students cut out a triangular head and tail, as well as some small squares or rectangles for feet. They can trim the feet to look like pointy claws if they desire. Glue these pieces in the appropriate places.
Pass out a box of oil pastels to each student to decorate their alligators with simple patterns and designs, including a face. Remind them to write their name on the back.


|
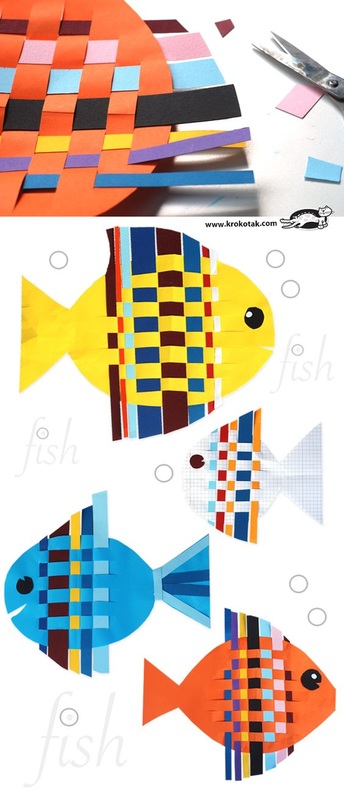
This looks like a fun variation on the project, if you want to check it out. (Click on the picture to go to website link)
|
