Fourth Grade
Islamic rug and tile patterns
The era of Islam (also known as Moslem) was founded in Arabia by Mohammed in the year 622 AD. Within a hundred years, Moslem armies spread the religion both westward across North Africa to the Atlantic Ocean, as well as to the east. That is why you can find Islamic art and architecture all over the world, not only in Arabia, but in places like India, Africa and Spain!
Islamic art is characterized by geometric designs. Early Islamic artists borrowed key elements of designs from the Greeks and Romans (and other early cultures), but then they made the designs more complicated and elaborate. Islamic mathematicians, astronomers and scientists also contributed to the creation of this unique new style. As a result, these designs can be thought of as both art and science! The art is at the same time mathematically precise, aesthetically pleasing, and symbolic.
Islamic art is characterized by geometric designs. Early Islamic artists borrowed key elements of designs from the Greeks and Romans (and other early cultures), but then they made the designs more complicated and elaborate. Islamic mathematicians, astronomers and scientists also contributed to the creation of this unique new style. As a result, these designs can be thought of as both art and science! The art is at the same time mathematically precise, aesthetically pleasing, and symbolic.
Islamic carpets were important means of spreading these complex new design ideas. Carpets were portable and highly prized. Many decorative schemes on buildings, tiles and pottery were in turn influenced by carpet designs. Human figures were prohibited in Islamic religious art, so the artists made up for it with extremely intricate designs. Sometimes they even incorporated cursive writing into their designs. The geometry of the patterns is based on circles, squares, polygons and stars. These shapes, repeated and intertwined, symbolize both the unity and diversity of creation.
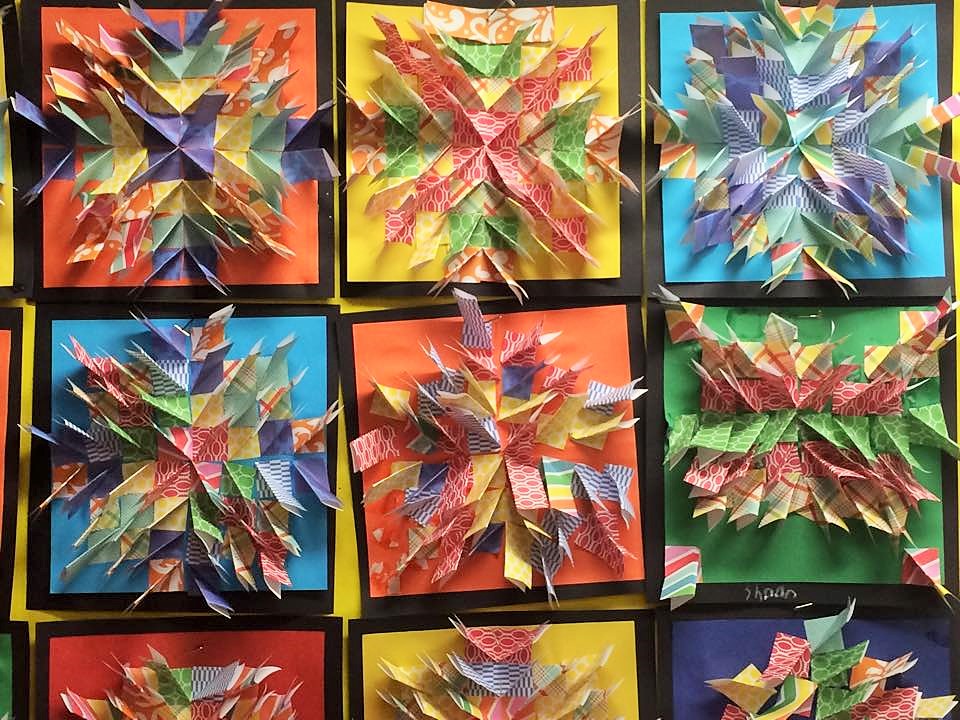
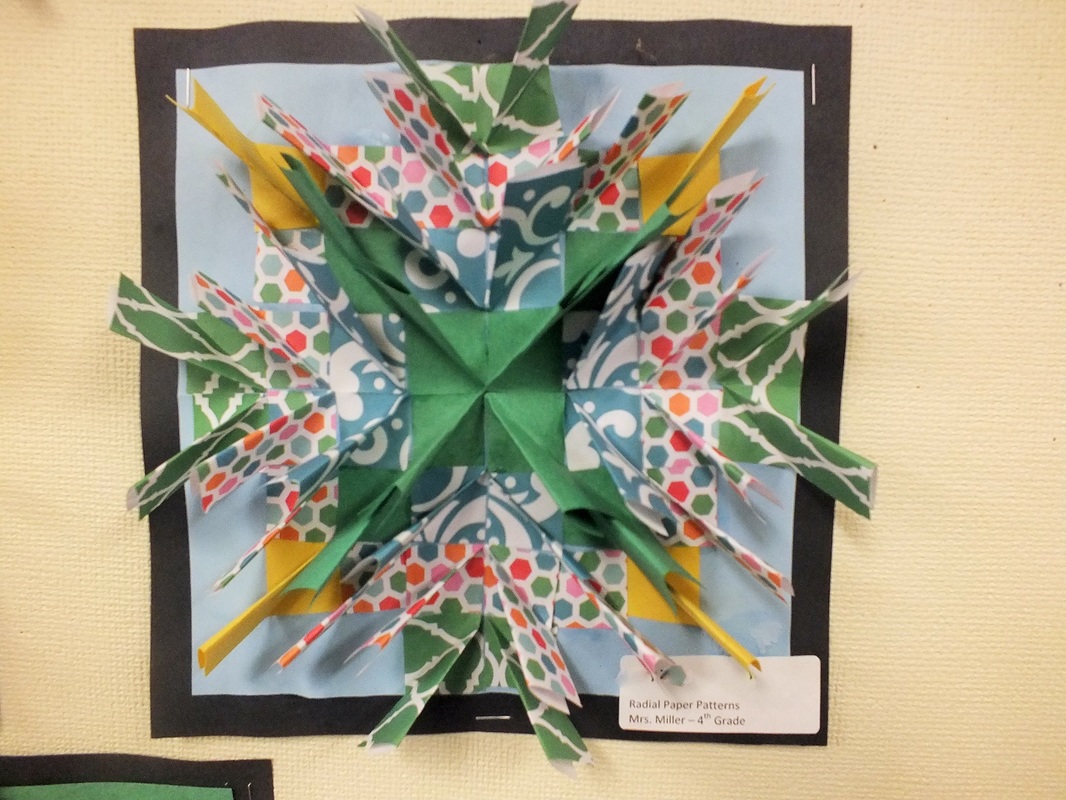
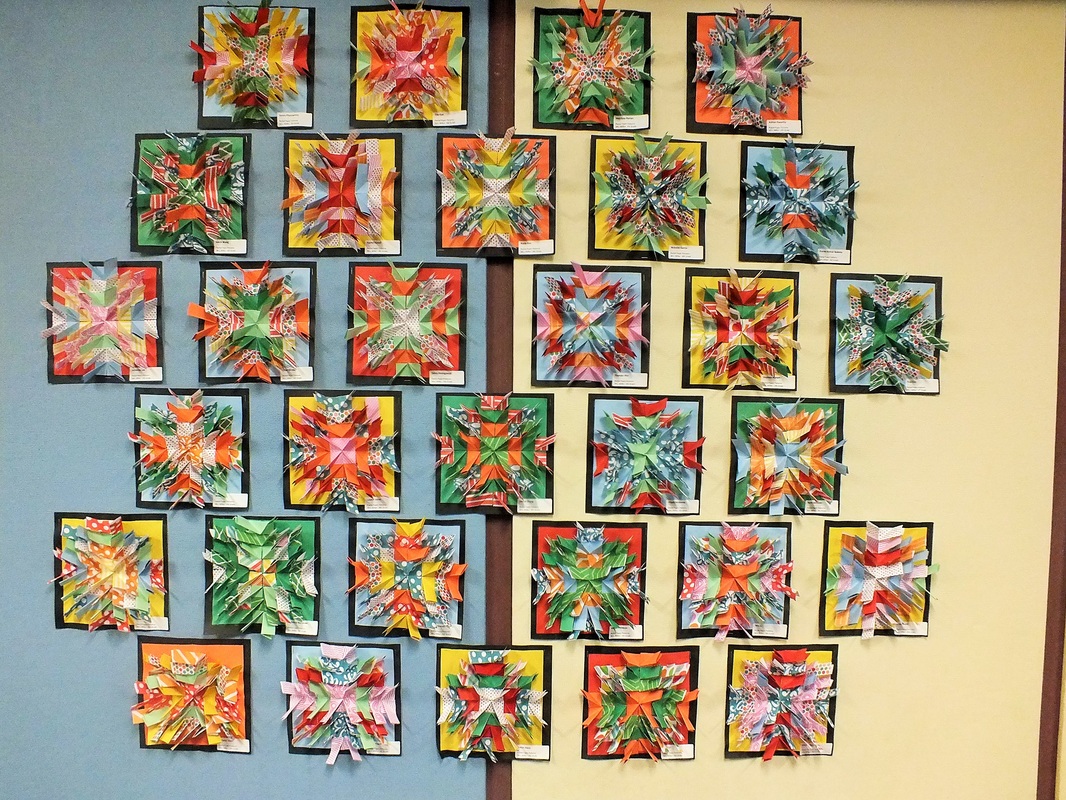
Notice how a lot of the designs are based on a RADIAL SYMMETRY pattern. (Remember that with symmetry, each half of a picture is like a mirror image.) With Radial Symmetry, it's like a four-way mirror image, repeating the pattern around a central axis. The four sections represent a completeness (order and unity), just as we know that four quarters make a whole.
Notice how a lot of the designs are based on a RADIAL SYMMETRY pattern. (Remember that with symmetry, each half of a picture is like a mirror image.) With Radial Symmetry, it's like a four-way mirror image, repeating the pattern around a central axis. The four sections represent a completeness (order and unity), just as we know that four quarters make a whole.
The Project
NOTE: This project takes quite a bit of prep work (but check the 4th grade drawer to see what precut pieces are left from previous classes), and it will take the students longer than an hour to complete (more like 1-1/2 hours), so plan accordingly. But the results certainly make it all worth it!!!
Prep: 2 hours, including making sample. Use your helpers to assist cutting the many, many (ever so many) paper squares you will need - share the load!
Materials: For each student's project you will need:
- 1 - 8" construction paper square, various colors
- 1 - 9" black construction paper square, for background
- 44 - 2" paper squares (use scrapbook paper, colored computer paper, or lightweight construction paper)
- Bottle of glue
*NOTE: to save time in class, I pre-bagged a selection of colored papers (about 4 patterned choices with 3 plain choices as a general rule) for each student, so that the students got to pick which bag of colors they wanted, rather than spending time selecting every paper. I included more papers than they needed in each bag so they would still have some choice of what to use within their bag.
Lesson:
**NOTE** Because there is so much time-consuming (have we mentioned that yet?) folding involved, you may start with Step 1, then have the students start working on Steps 2-4 below while you are presenting the art information about Islamic patterning on tiles and rugs.
1. Have each student select one of the 8" colored squares. Then have them choose 4-6 patterns of the 2" squares to coordinate with the larger square, to total 44 squares in all. *Make sure at least 2-3 of the patterns are solid colors (or appear mostly solid). This will make the overall design more effective. (See note above about option of offering pre-sorted bags of small paper choices)
2. Fold the 8" colored square in half, open up, then fold in half the other way. This will provide guidelines along which to glue the smaller squares when they are ready.
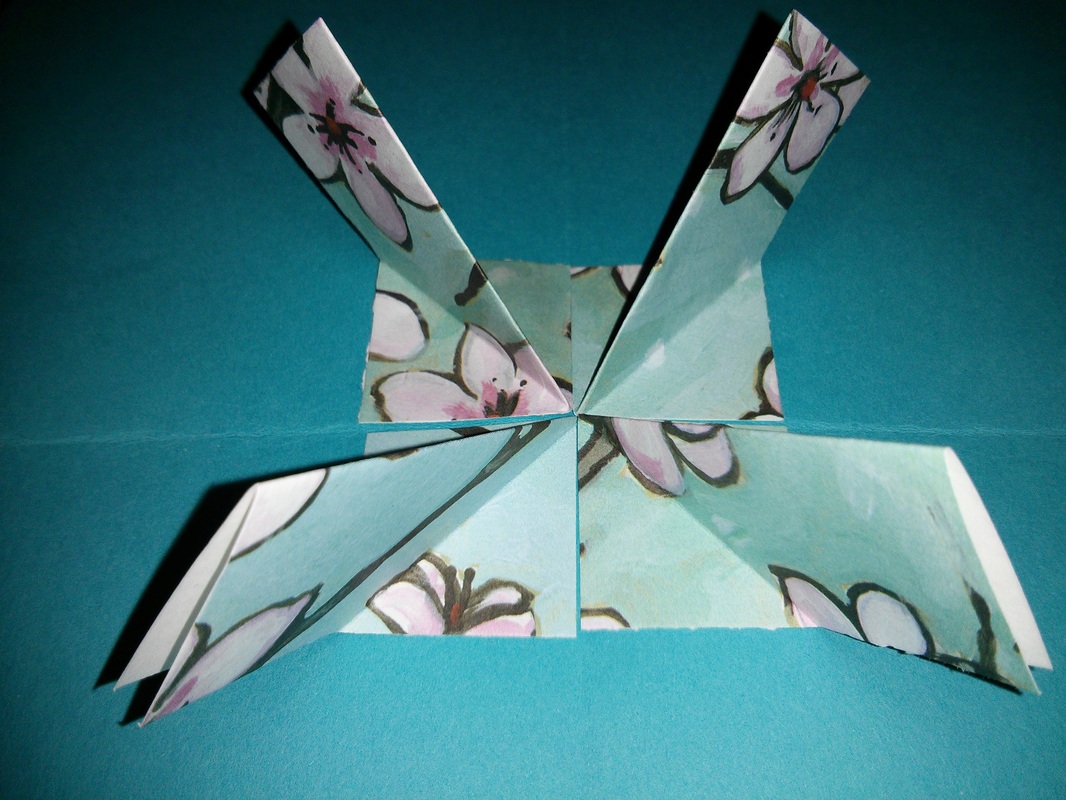
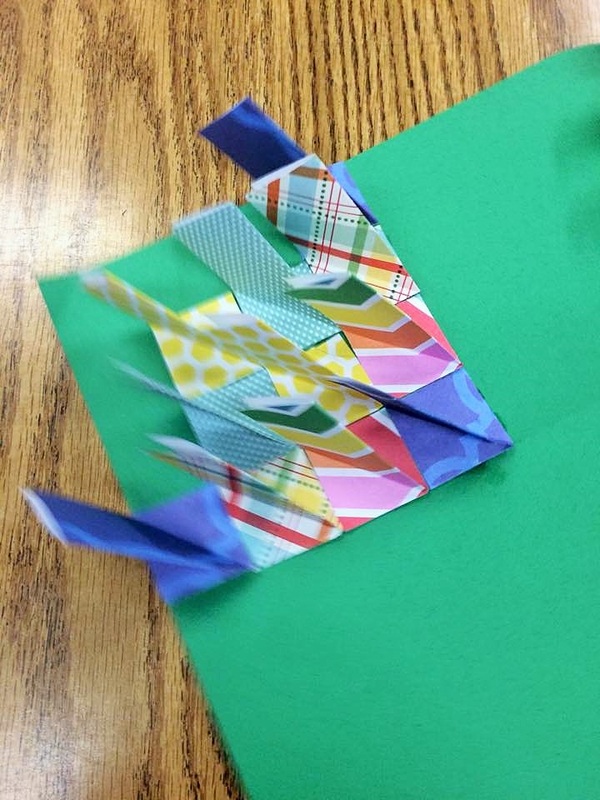
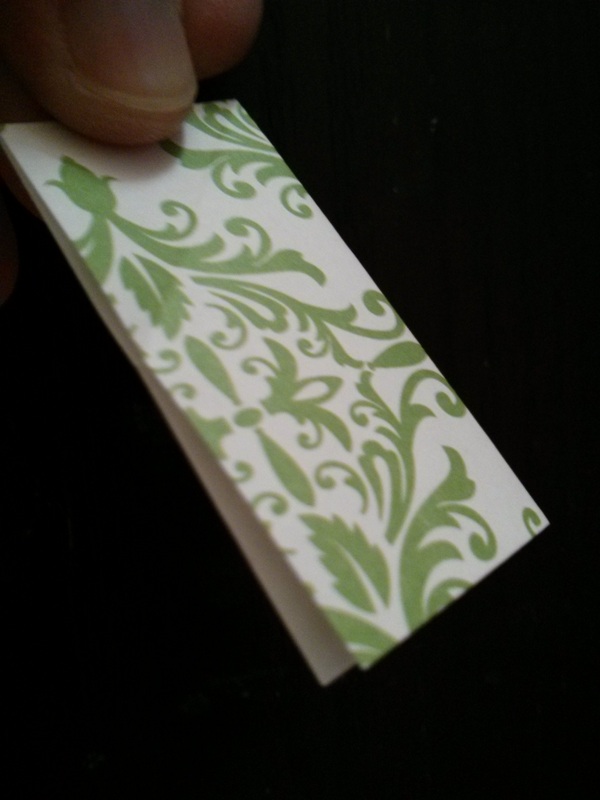
3. Fold each of the 2" squares in half, patterned side out (if there is a difference). Because there are so many squares, a small stack of three or four of these squares could be folded in half at the same time, if desired.
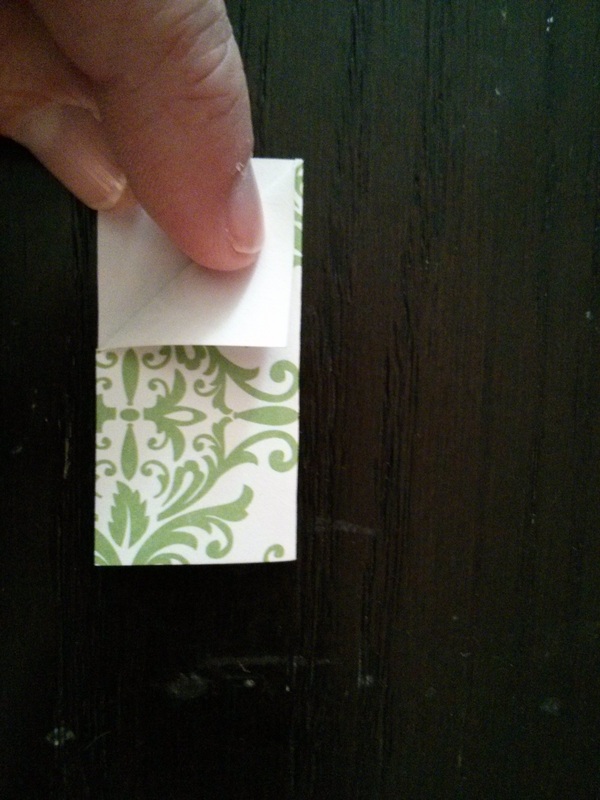
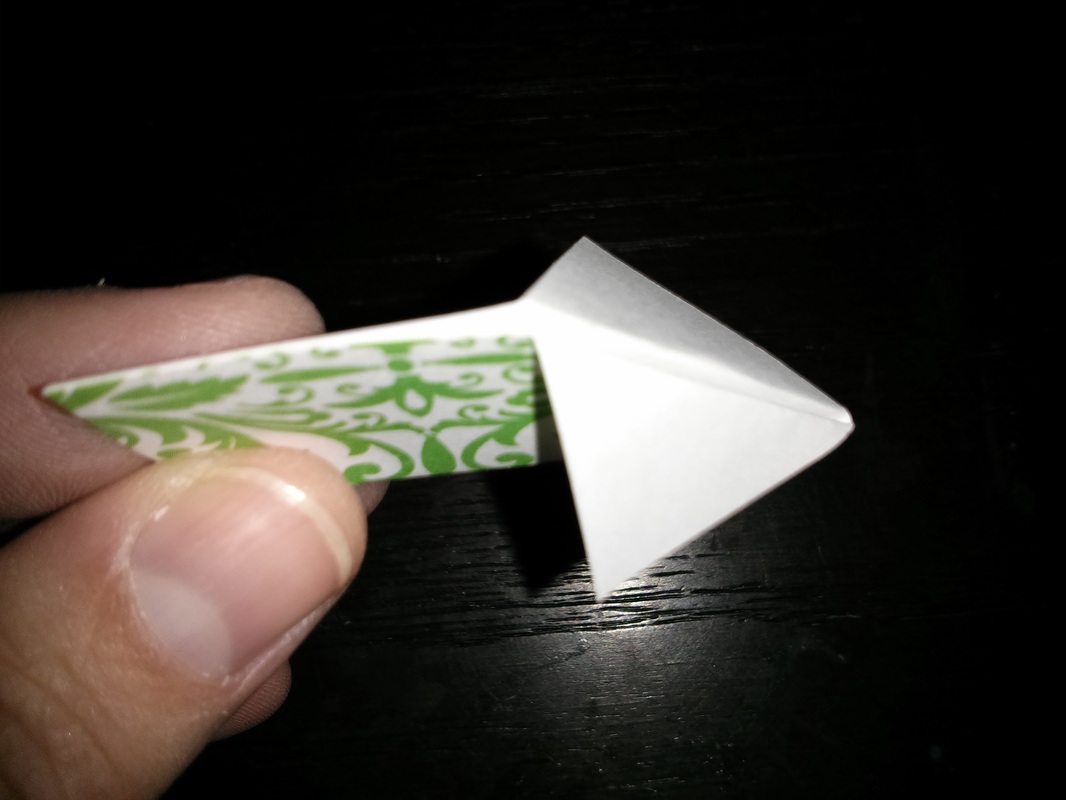
4. On each of these folded small squares, fold up the ends on one end at an angle, like a paper airplane (see pictures below).
Prep: 2 hours, including making sample. Use your helpers to assist cutting the many, many (ever so many) paper squares you will need - share the load!
Materials: For each student's project you will need:
- 1 - 8" construction paper square, various colors
- 1 - 9" black construction paper square, for background
- 44 - 2" paper squares (use scrapbook paper, colored computer paper, or lightweight construction paper)
- Bottle of glue
*NOTE: to save time in class, I pre-bagged a selection of colored papers (about 4 patterned choices with 3 plain choices as a general rule) for each student, so that the students got to pick which bag of colors they wanted, rather than spending time selecting every paper. I included more papers than they needed in each bag so they would still have some choice of what to use within their bag.
Lesson:
**NOTE** Because there is so much time-consuming (have we mentioned that yet?) folding involved, you may start with Step 1, then have the students start working on Steps 2-4 below while you are presenting the art information about Islamic patterning on tiles and rugs.
1. Have each student select one of the 8" colored squares. Then have them choose 4-6 patterns of the 2" squares to coordinate with the larger square, to total 44 squares in all. *Make sure at least 2-3 of the patterns are solid colors (or appear mostly solid). This will make the overall design more effective. (See note above about option of offering pre-sorted bags of small paper choices)
2. Fold the 8" colored square in half, open up, then fold in half the other way. This will provide guidelines along which to glue the smaller squares when they are ready.
3. Fold each of the 2" squares in half, patterned side out (if there is a difference). Because there are so many squares, a small stack of three or four of these squares could be folded in half at the same time, if desired.
4. On each of these folded small squares, fold up the ends on one end at an angle, like a paper airplane (see pictures below).
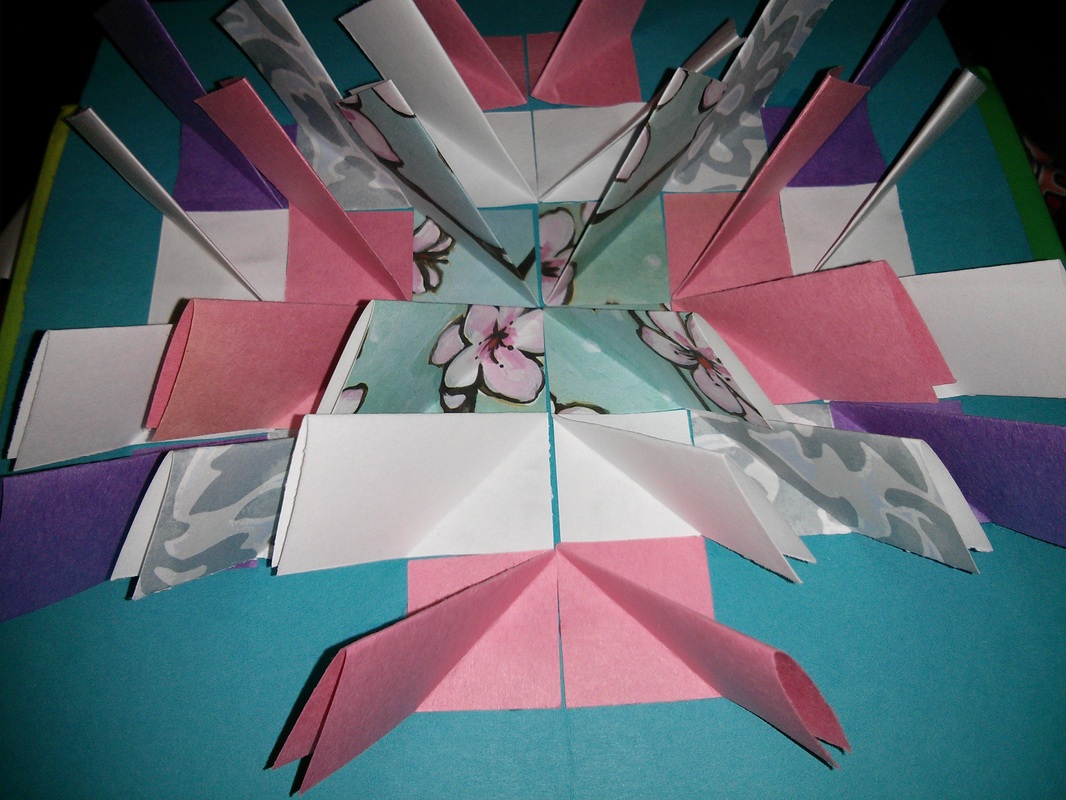
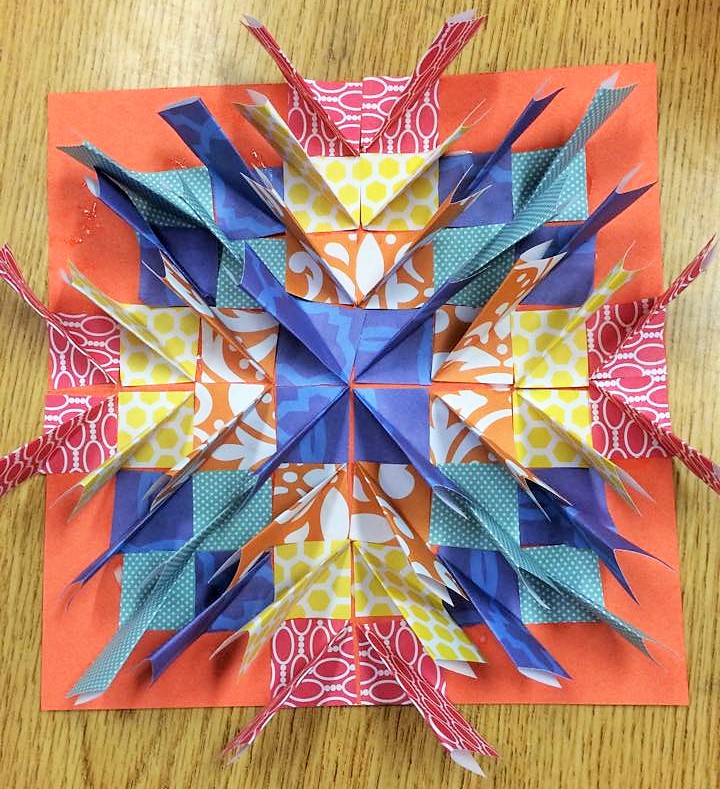
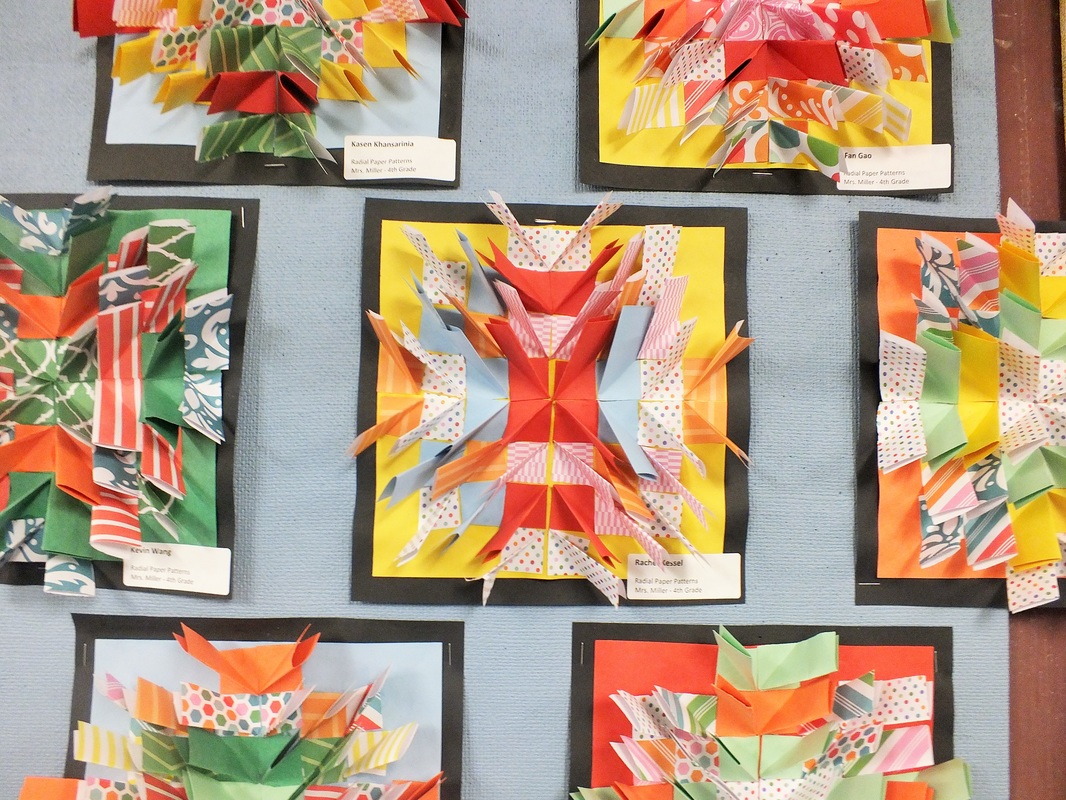
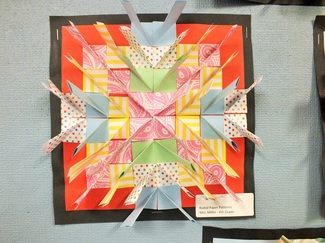
5. Have the students decide on the pattern to lay out their small squares, keeping in mind symmetrical or radial balance. Also note the four quarters of the 8" square that resulted from the folding lines in step 2. This will help determine the pattern of the radial design. Three rows of the small folded papers will radiate from the center of the paper, forming a square of 36 pieces. On the outer row, the last 8 squares will be added, with only 2 on each row, (as per the sample).
*If students want to try another pattern, that should be fine too, as long as they are trying to keep up the SYMMETRY. In my last class, some students were struggling to finish on time, and we opted for a simplified pattern with less papers needed (more empty spaces). They also looked great!
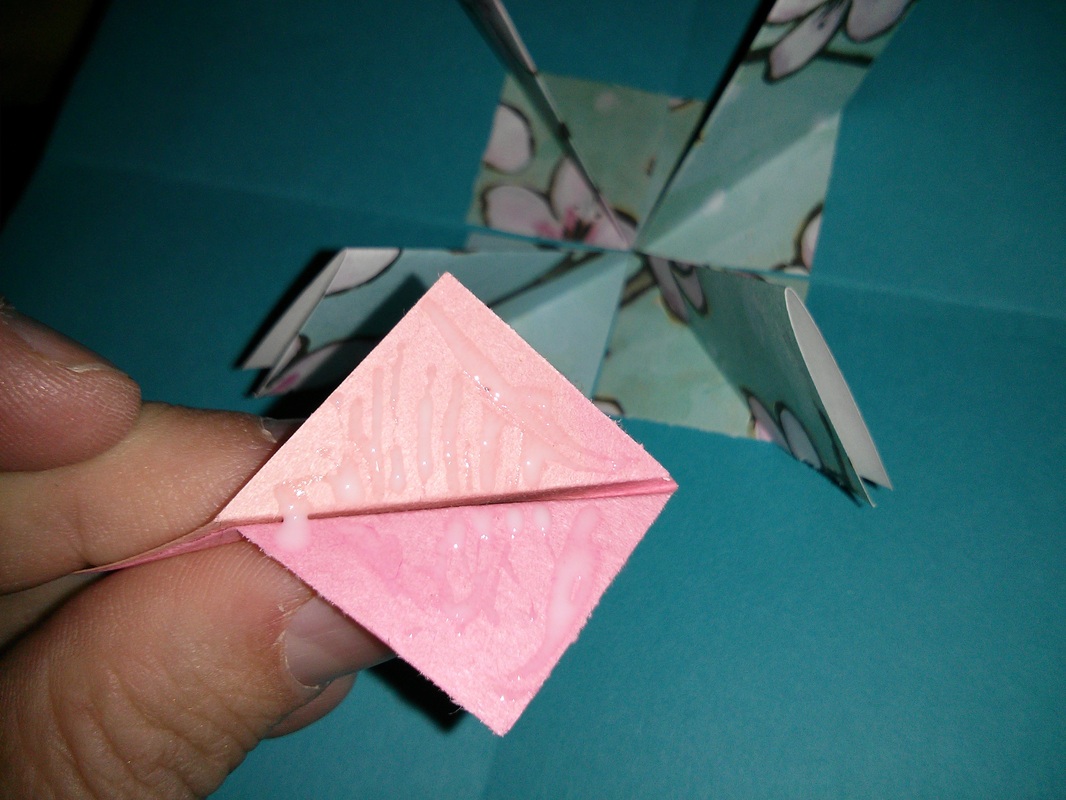
6. Flatten the "airplane folds" while pinching together, and apply glue (see pictures below). Affix to the center of the 8" square along folded guidelines. The rest of the folded 2" square will angle up, away from the paper. Make sure each angle points out to the corner of its section. All the remaining squares glued to that section will follow the same angle. Each quarter will point out to its own corner (see pictures below).
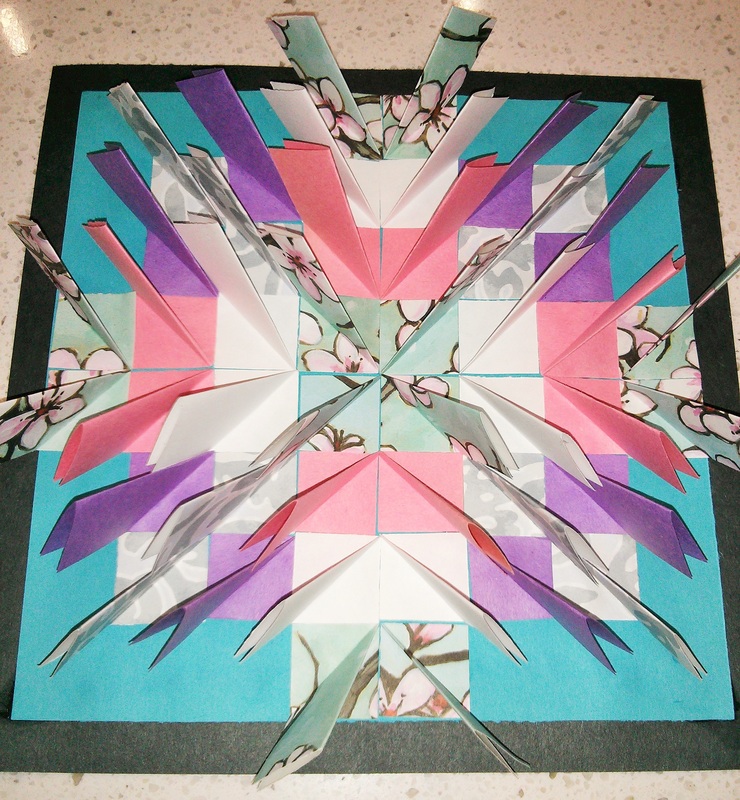
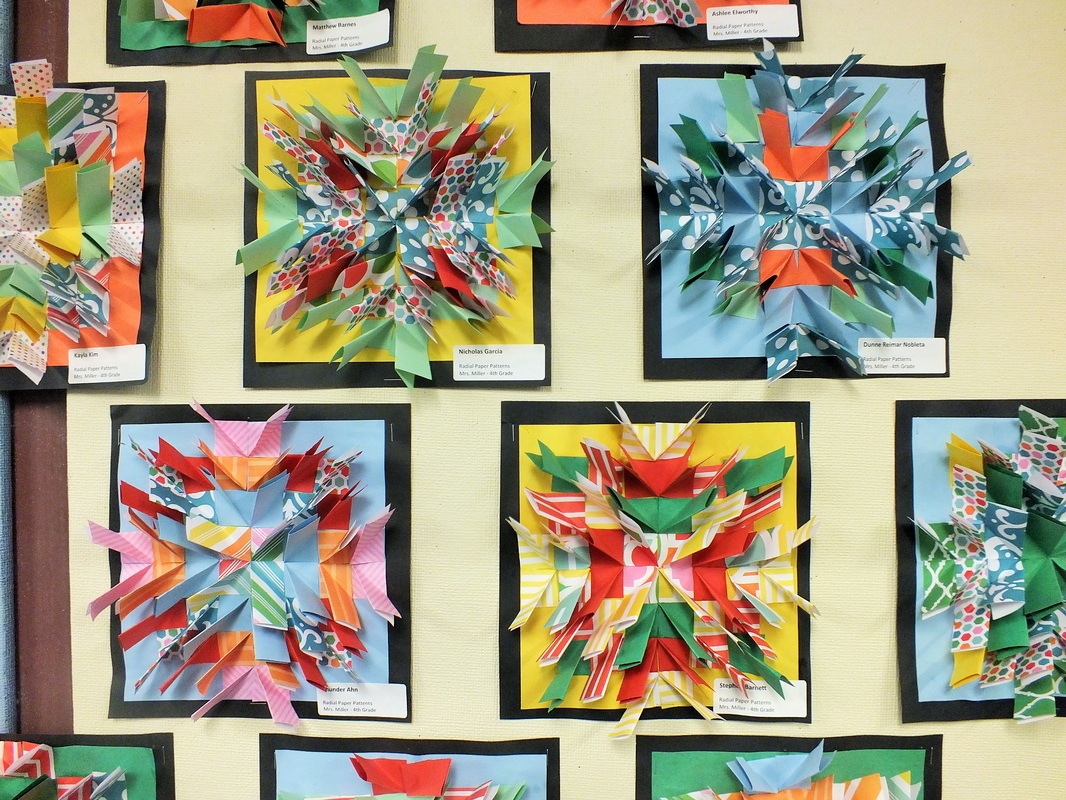
7. When all the squares have been glued down. the students can glue the whole paper to the black background. And write their name on the back (white crayon or pencil will work).
*If students want to try another pattern, that should be fine too, as long as they are trying to keep up the SYMMETRY. In my last class, some students were struggling to finish on time, and we opted for a simplified pattern with less papers needed (more empty spaces). They also looked great!
6. Flatten the "airplane folds" while pinching together, and apply glue (see pictures below). Affix to the center of the 8" square along folded guidelines. The rest of the folded 2" square will angle up, away from the paper. Make sure each angle points out to the corner of its section. All the remaining squares glued to that section will follow the same angle. Each quarter will point out to its own corner (see pictures below).
7. When all the squares have been glued down. the students can glue the whole paper to the black background. And write their name on the back (white crayon or pencil will work).